Tape Preparation
- To produce a mother tape, cut a ~12″ long piece of tape and secure it on one end with another piece of tape. This length makes it easier to bend it in the way that is desirable below.
- Use Greener tape for all tapes.
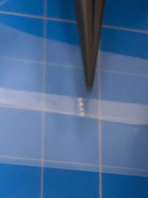
- Place some bulk on one side of the tape about 1/4 of the way up its length. Please ask a senior student how much bulk to place.
- Bend the tape so that the opposite side comes down upon the bulk (see video below).
- Avoid directly pushing on the flake – push down around the material. This is basically the only difference between exfoliating graphite vs non-graphite materials; with graphite you can push on the bulk as much as you wish and it may even be advantageous to do so.
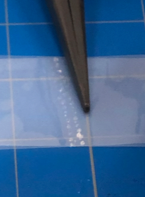
- Start with 1 large or 2-3 smaller flakes for more material. Again, please ask a grad student with experience about this step. One gets a feel for the amount of starting bulk after a while.
- Now produce a line of bulk across the tape.

- Once a line of material has been produced (2) begin exfoliating in the other direction to fill out a 4″~ length.
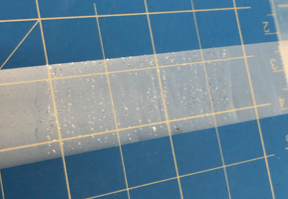
This concludes tape preparation for most materials. Note that for graphite you may press much harder. Please watch the following videos for graphite exfoliation.

This concludes mother tape preparation. In order to produce a daughter tape, cut a 5-10″ piece of tape and fold it in on both sides to make thumb grips. Then lightly set the tape onto a mother tape and very gently paintbrush it onto the mother tape. Peel the tape off then proceed to the next step.